Meeting 16
MC: Nathan O.
Next Monday: Isaac
LVL2
Today, you'll be an audience for LVL1 presentations.
You will conduct the graduation ceremony tomorrow.
LVL1
Midpoint presentations today!
You can show what you have from your own laptop, but please send me finished work so that I can post it on your site.
Exporting Twine:
Build >> Publish to File
This will create an HTML file that you can email to me.
Exporting Construct:
You can export your finished game as an "HTML5 game" — Construct will create a zipped file with all of your files/folders, and you can send me the zipped file. Then, I'll put the game on my server and link it to your website.
Btw: if Gmail doesn't allow you to email the zipped file, then you can use the gDrive I created for this program (orange button to the left) and let me know it's in there.
OR, you can upload it yourself to the Construct Arcade. You'll need to make a personal account with Construct, and you'll export a special type of zipped file required by their system. In this case, just send me the URL of the live game, and I'll link it to your website.
3d Modeling
Here are some tools that are quick to pick up:
Blender is installed on our machines — it's complex, but the preferred tool for making 3D objects and animations. (It's open source an free to download, btw).
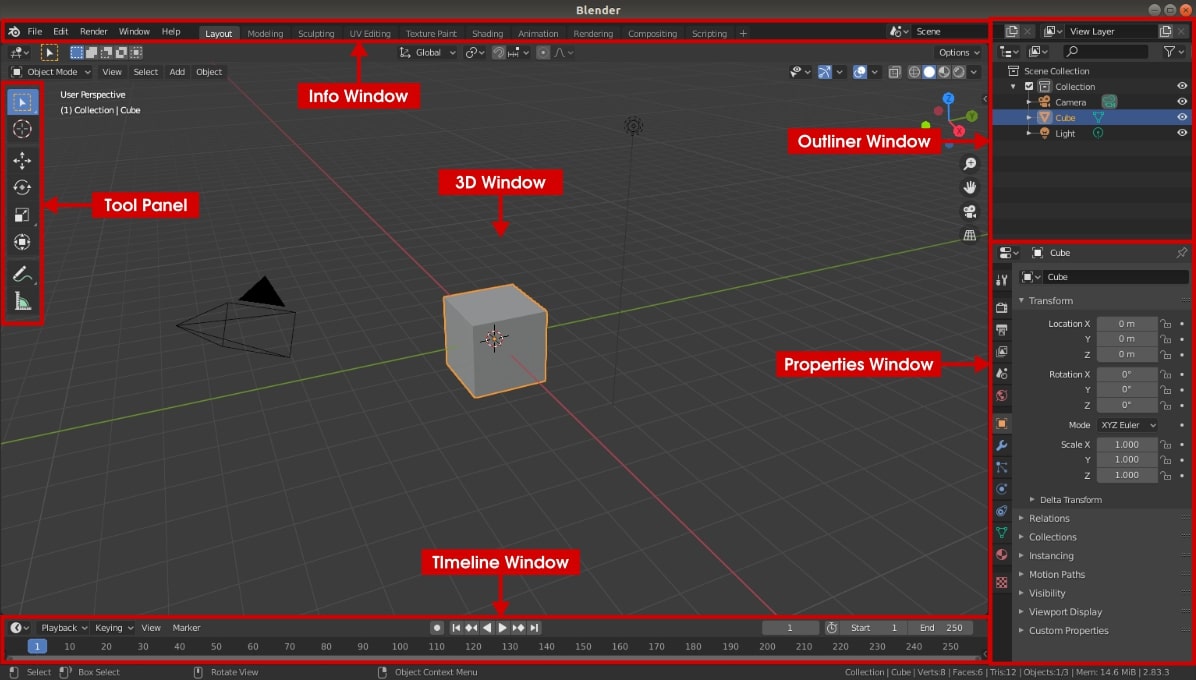
Beginner video for creating/moving 3D objects:
The Mode Menu is in the upper left.
Object Mode: for placing new objects and moving them around
Edit Mode: for changing objects. First, you click-and-drag to select the part of the object you want to change (points, edges, entire faces/planes), then switch to the Move Tool.
Some handy shortcut keys:
G — hold to move selected objects
R — hold to rotate selected objects
S — hold to rescale selected objects
A — select all
You can render a model — meaning that you can export an image separately from the Blender viewport.
First, set up your camera view:
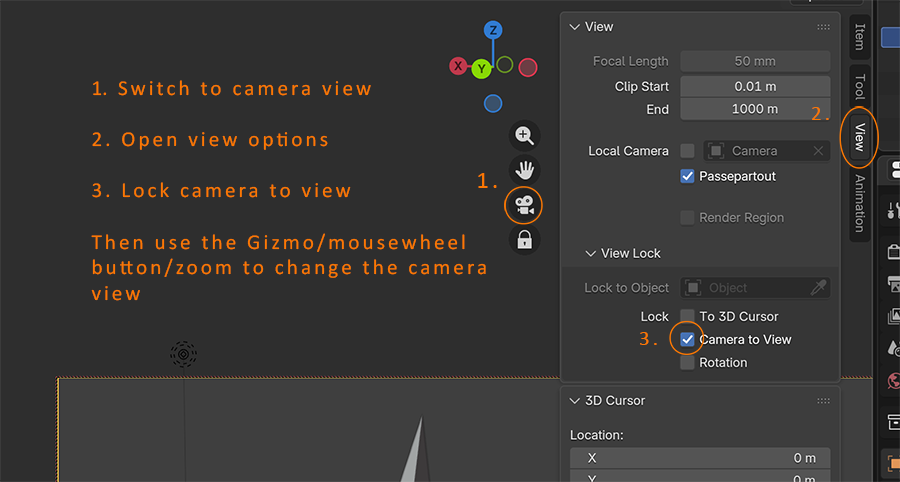
Then, Render >> Render Image.
Then, Image >> Save As